Advanced Settings
The Advanced tab in the Beaver Builder settings is where you can enable and disable settings, which usually require custom coding, in order to achieve the desired results
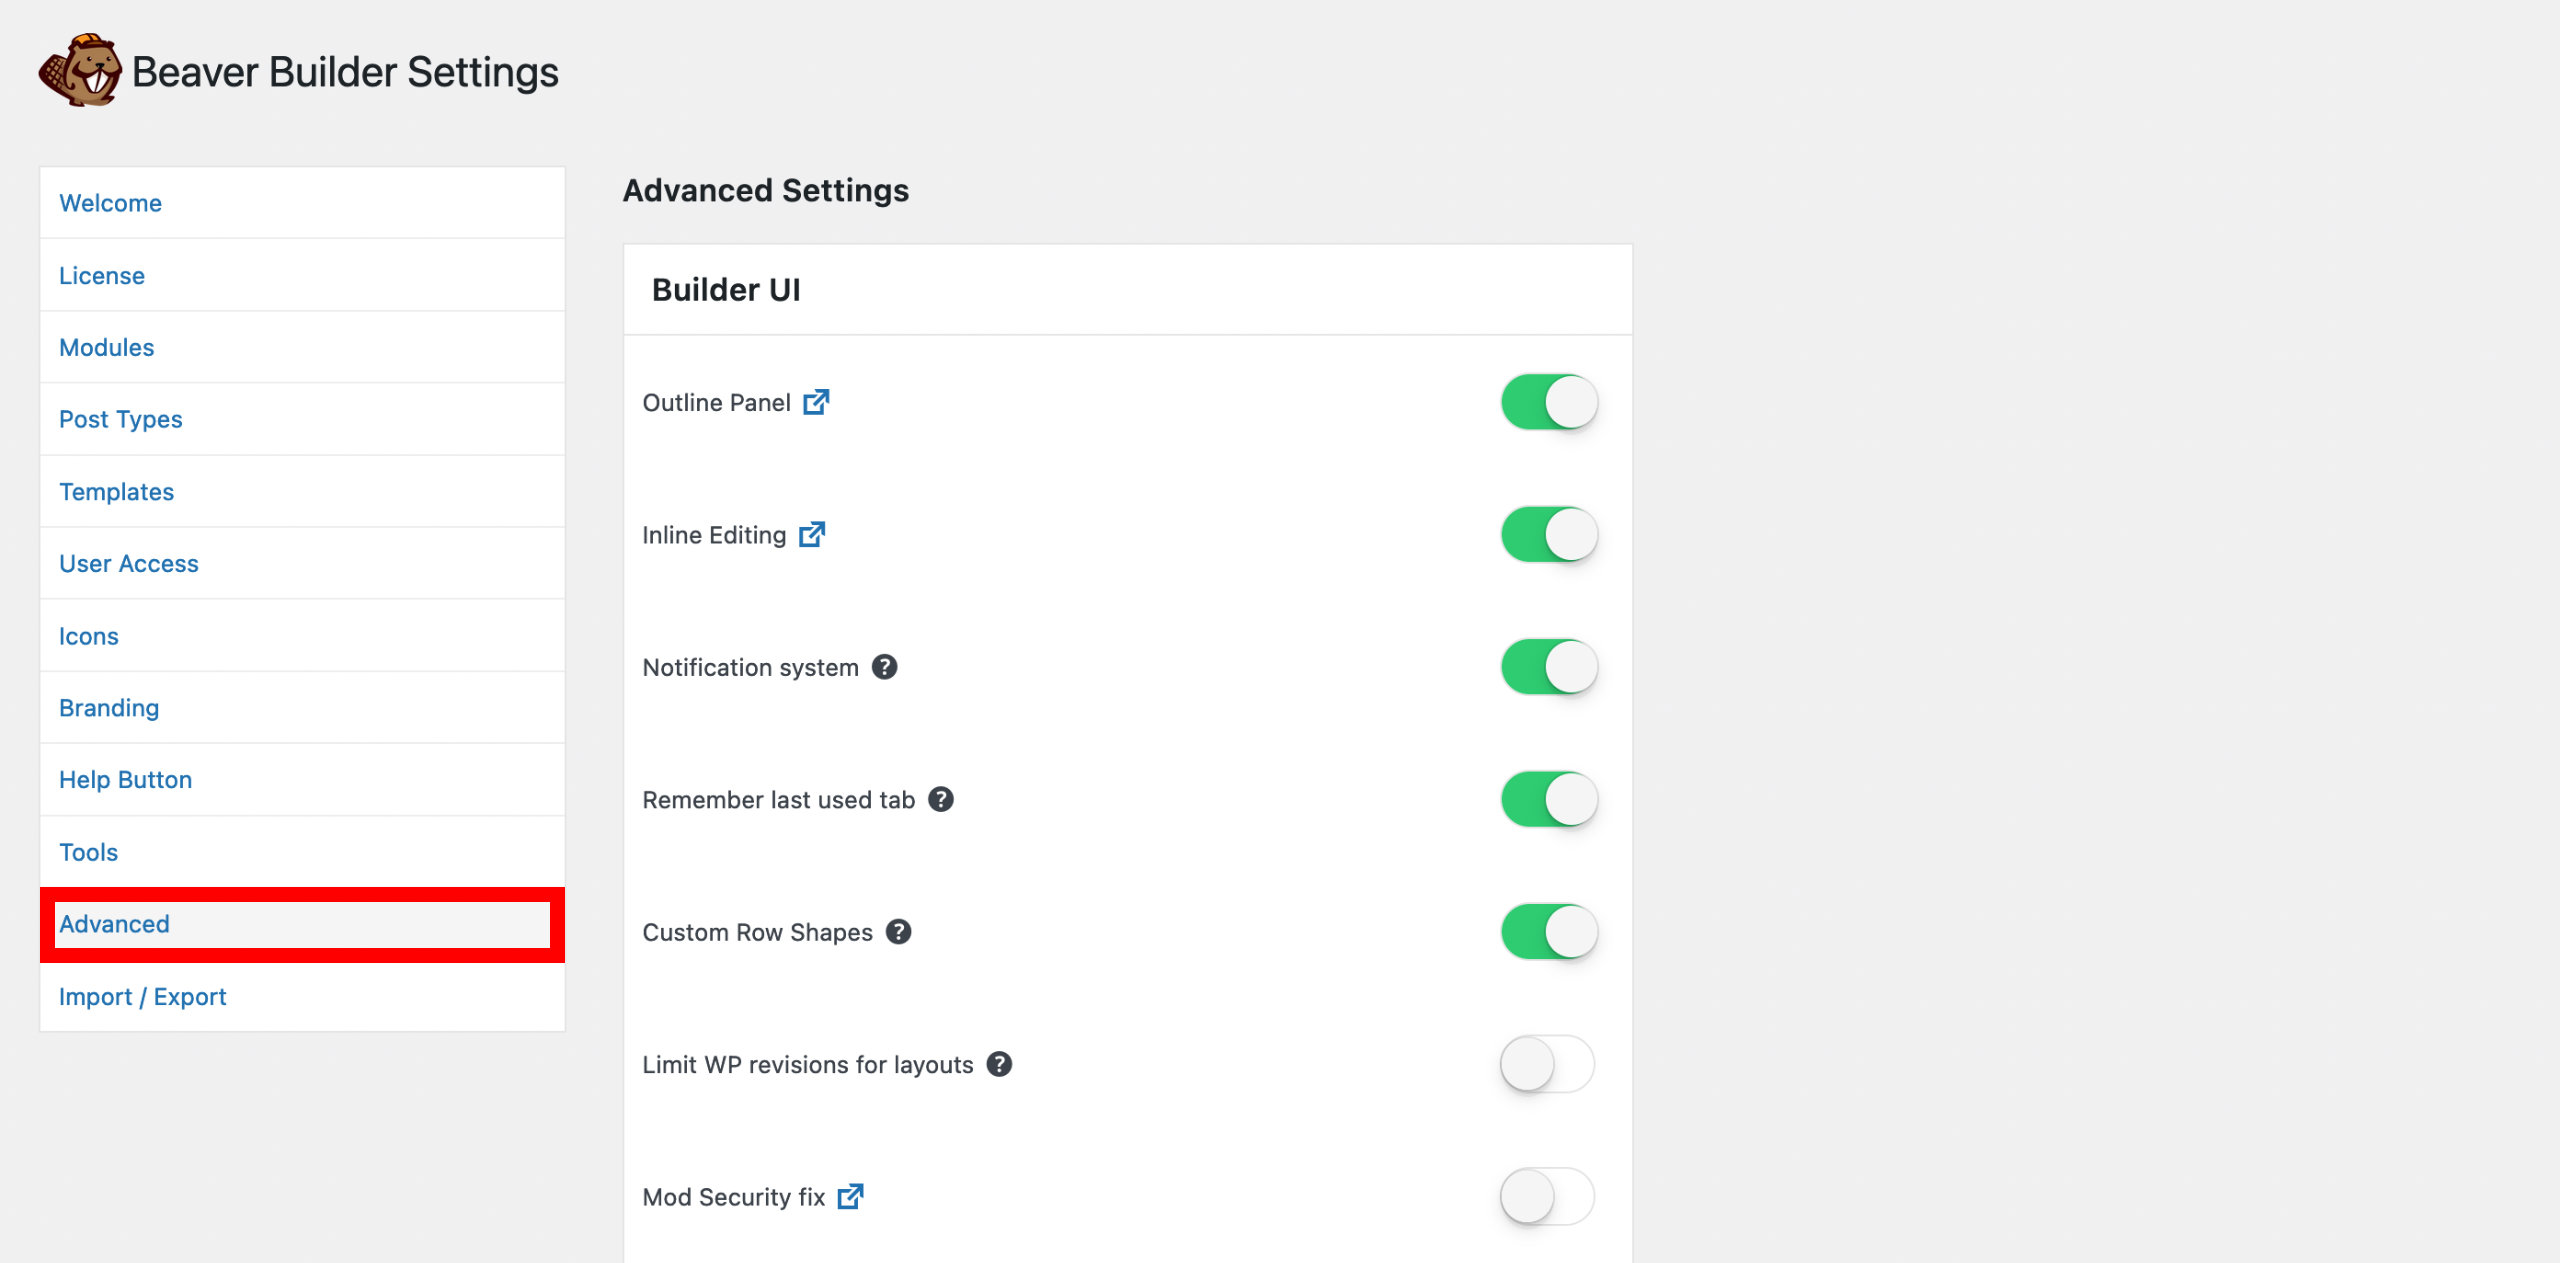
Access Advanced
- Access your site's WordPress Admin Dashboard.
- Navigate to Settings > Beaver Builder.
- Then click the Advanced tab.

Builder UI
The Builder UI section allows you to enable or disable Beaver Builder user interface features.
Outline Panel
Enable or disable the Outline Panel in the Beaver Builder user interface.
✅ Enabled by default.
Inline Editing
Enable or disable the Inline Editing in the Beaver Builder overlay UI.
✅ Enabled by default.
Notification system
Enable or disable the Notification system in the Beaver Builder user interface. When disabled you will not receive alerts for new posts on the Beaver Builder blog.

✅ Enabled by default.
Remember last used tab
By default, Beaver Builder remembers the last tab opened in the row, column, or module settings window. Using the Remember last used tab, you can enable or disable this feature.
✅ Enabled by default.
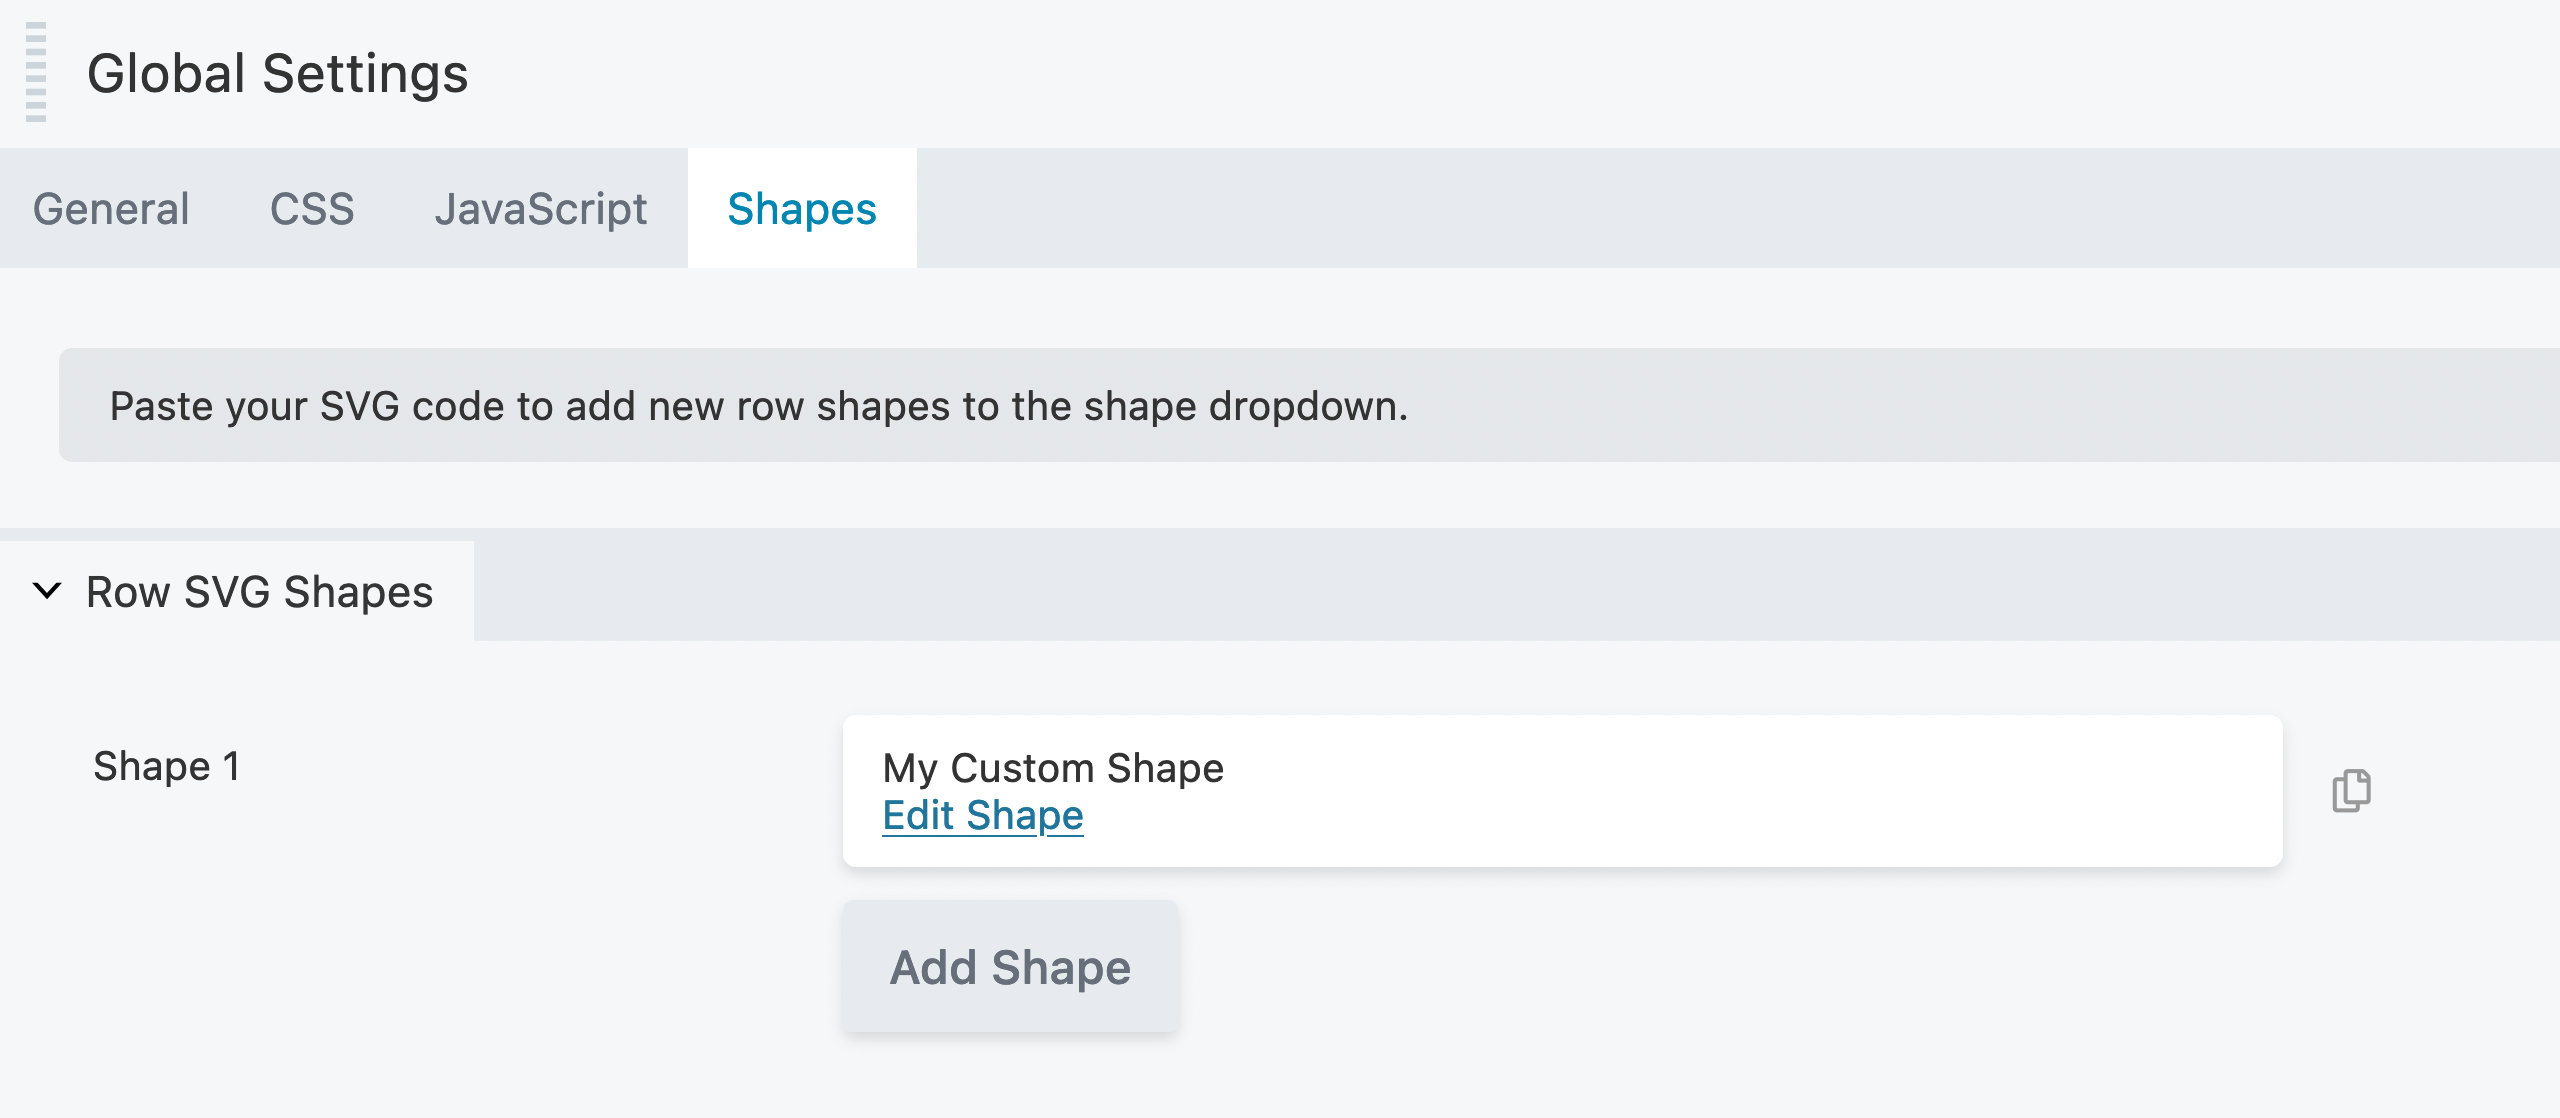
Custom Row Shapes
Enable or disable the custom row shapes tab from Tools Menu > Global Settings.

✅ Enabled by default.
Limit WP revisions for layouts
By default, does not limit the amount of revisions.
Enabling this setting will limit revisions to 10 for Beaver Builder layouts. Set to 0 to completely disable revisions for layouts/pages controlled by Beaver Builder.
❌ Disabled by default.
Mod Security fix
Enable the mod_security fix which prevents 403 errors when using Beaver Builder in shared hosting environments.
❌ Disabled by default.
Small Data Mode
When enabled, empty/blank options will not be saved to the database, reducing post meta data size by approximately 50%.
❌ Disabled by default.
Node Labels
When enabled, displays the node label and tooltip when hovering over the node settings icon and in the top right hand corner of the node outline overlay.
Outline Panel labels are not removed when the Node Labels option is disabled.

✅ Enabled by default.
WP Admin
The WP Admin section allows you to enable or disable Beaver Builder features from the WordPress user interface.
Allow pages to be sortable
Enable or disable the Beaver Builder filter link found in the WordPress admin dashboard for pages, posts, and custom post types.

✅ Enabled by default.
Show duplicate action links
Enable or disable the Duplicate Page option from the WordPress page, post, and custom post type list.
✅ Enabled by default.
Show duplicate link in adminbar
Enable or disable the Duplicate Page link from the WordPress admin bar > Beaver Builder.
✅ Enabled by default.
Show advanced module usage
Enable or disable advanced module usage. When enabled, this will show which Beaver Builder modules and how many of each type are used on the front end of your website. This information is displayed via WordPress admin dashboard > Settings > Beaver Builder > Modules tab.
❌ Disabled by default.
Assets
The Assets section allows you to enable or disable asset features from Beaver Builder.
Google Fonts
Enable or disable Google Fonts. When disabled, Google Fonts will not be enqueued or available for Beaver Builder style options.
✅ Enabled by default.
Font Awesome
Enable or disable Google Fonts. When disabled, Font Awesome will not be enqueued, even if modules require it.
✅ Enabled by default.
Prefer GD for image cropping
Enable or disable the PHP GD library. WordPress uses ImageMagick for image processing by default, which is slow and not threaded. Performance is much better with GD, which is native to PHP.
❌ Disabled by default.
Frontend
The Frontend section allows you to enable or disable Beaver Builder frontend features.
Render css/js assets inline
Enable or disable rendering of Beaver Builder assets inline. When enabled, instead of loading Beaver Builder CSS and JavaScript as an asset file, you can render the CSS inline in the <head> tag and the JavaScript inline right before the closing <body> tag.
This can be a solution to some rare caching issues, but in most cases you don’t need this enabled.
❌ Disabled by default.