Save a row, column, or module for reuse
You can save a row, column, or module for reuse on your site. You can also export saved rows, columns, and modules for use in other websites.
You can save your row, column, or module as standard or global. When you save an item as global, each instance of it that you drag into any page on your site is linked to all other instances. Any change you make to one instance will update all instanced and the global saved version. If you save an item as standard, each instance in your layout is independent of the centrally saved row or module and from any other instance of it. In other words, once you drag a standard row or module into your layout, it's just like any other row or module at that point.
If you already have a row, column, or module created in a Beaver Builder layout, follow the first procedure here. If you want to create a saved row or module before you have created a row or module in a regular layout, you can use the second procedure.
Save a row, column, or module from your layout
If you've already created the row, column, or module that you want to save for reuse, follow these instructions.
To save an existing row, column, or module for reuse:
- Open the page that contains the row, column, or module you want to save.
- Open the row or module for editing by clicking the wrench tool.
- Click Save as.
- Enter a name for your saved module, decide if it will be standard ( No ) or Global ( Yes ) and click Save.
Your saved rows and columns can be accessed on both the Rows tab and the Saved tab in the Content panel. Saved modules are accessed on the Saved tab. They can also be accessed for editing through the Beaver Builder menu on the WordPress admin panel, as described in the next section.
Create a saved row, column, or module directly
You might want to create a saved row, column, or module that is not related to the layout on any specific page, for example to use it on future pages that you create or to use it in a Beaver Builder shortcode.
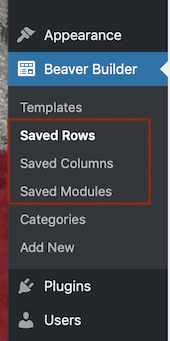
In this case, you can directly create and edit saved rows and modules in the Beaver Builder admin area, which can be accessed from the WordPress admin panel, as shown in this screenshot.
At this time, you can edit saved columns in the Beaver Builder menu but you can't create new ones. Instead, use the procedure in the previous section to create the column you want to save in a page or post layout and then use Save as.
Choose either of the following procedures to create a saved row or saved module respectively.
To create a saved row in the Beaver Builder admin area:
- From the Beaver Builder menu in the WordPress admin panel, click Saved rows.
- At the top of the panel, next to the Saved rows title, click the Add new button.
- Add a title.
- Select the checkbox if you want to make the saved row global
- Click Add saved row.
- Click Launch Beaver Builder.
Under your page header, you'll see an empty row and column. - Create the layout you want for the row by dragging in modules or columns from the Content panel in the normal fashion. You can add a complex column layout but you can only create one row.
- Click Done > Publish to save the row.
The saved row now appears both in the Beaver Builder admin area under Saved rows and also in regular page layouts in Beaver Builder on the Saved tab in the Content panel.
To create a saved module in the Beaver Builder admin area:
- From the Beaver Builder menu in the WordPress admin panel, click Saved modules.
- At the top of the panel, next to the Saved modules title, click the Add new button.
- Add a title.
- In the Module field, select the type of module you want to create.
- Select the checkbox if you want to make the saved module global.
- Click Add saved module.
- Click Launch Beaver Builder.
Under your page header, you'll see an empty module of the type that you chose. - Mouse over the module to reveal the Wrench icon, then click it to open the module settings.
- Add the module's settings, save the module, and click Done > Publish.
The saved module now appears both in the Beaver Builder admin area under Saved modules and also in regular page layouts in Beaver Builder on the Saved tab in the Content panel.