Create a card layout for posts
The Custom Layout Editor in the Post module is an option available when Beaver Themer is installed. You can use it to customize the HTML or tweak the CSS for more fine-tuned control over how posts are displayed.

This article covers how to customize the layout structure using HTML, field connections, and a bit of CSS to crease a card layout.
Card Layout
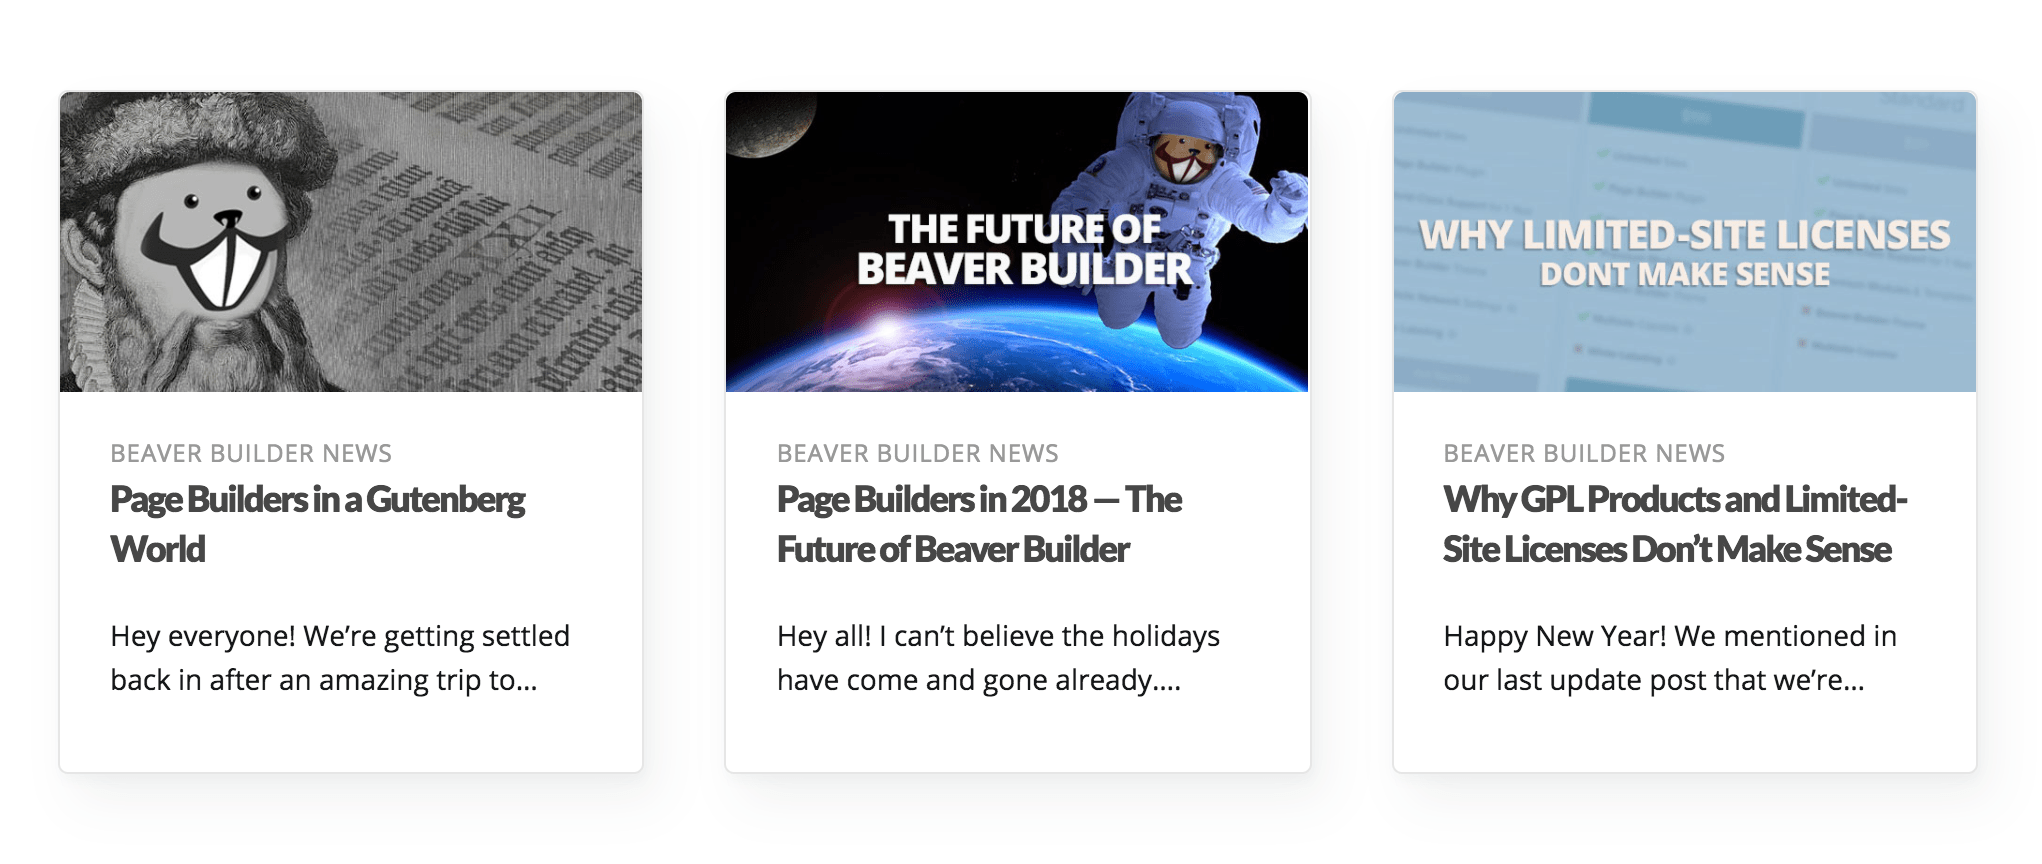
This procedure shows how to create a basic card layout, such as the one shown in this screenshot. This layout requires that Beaver Themer is installed but works both in Themer layouts and in regular Beaver Builder layouts for pages and posts.

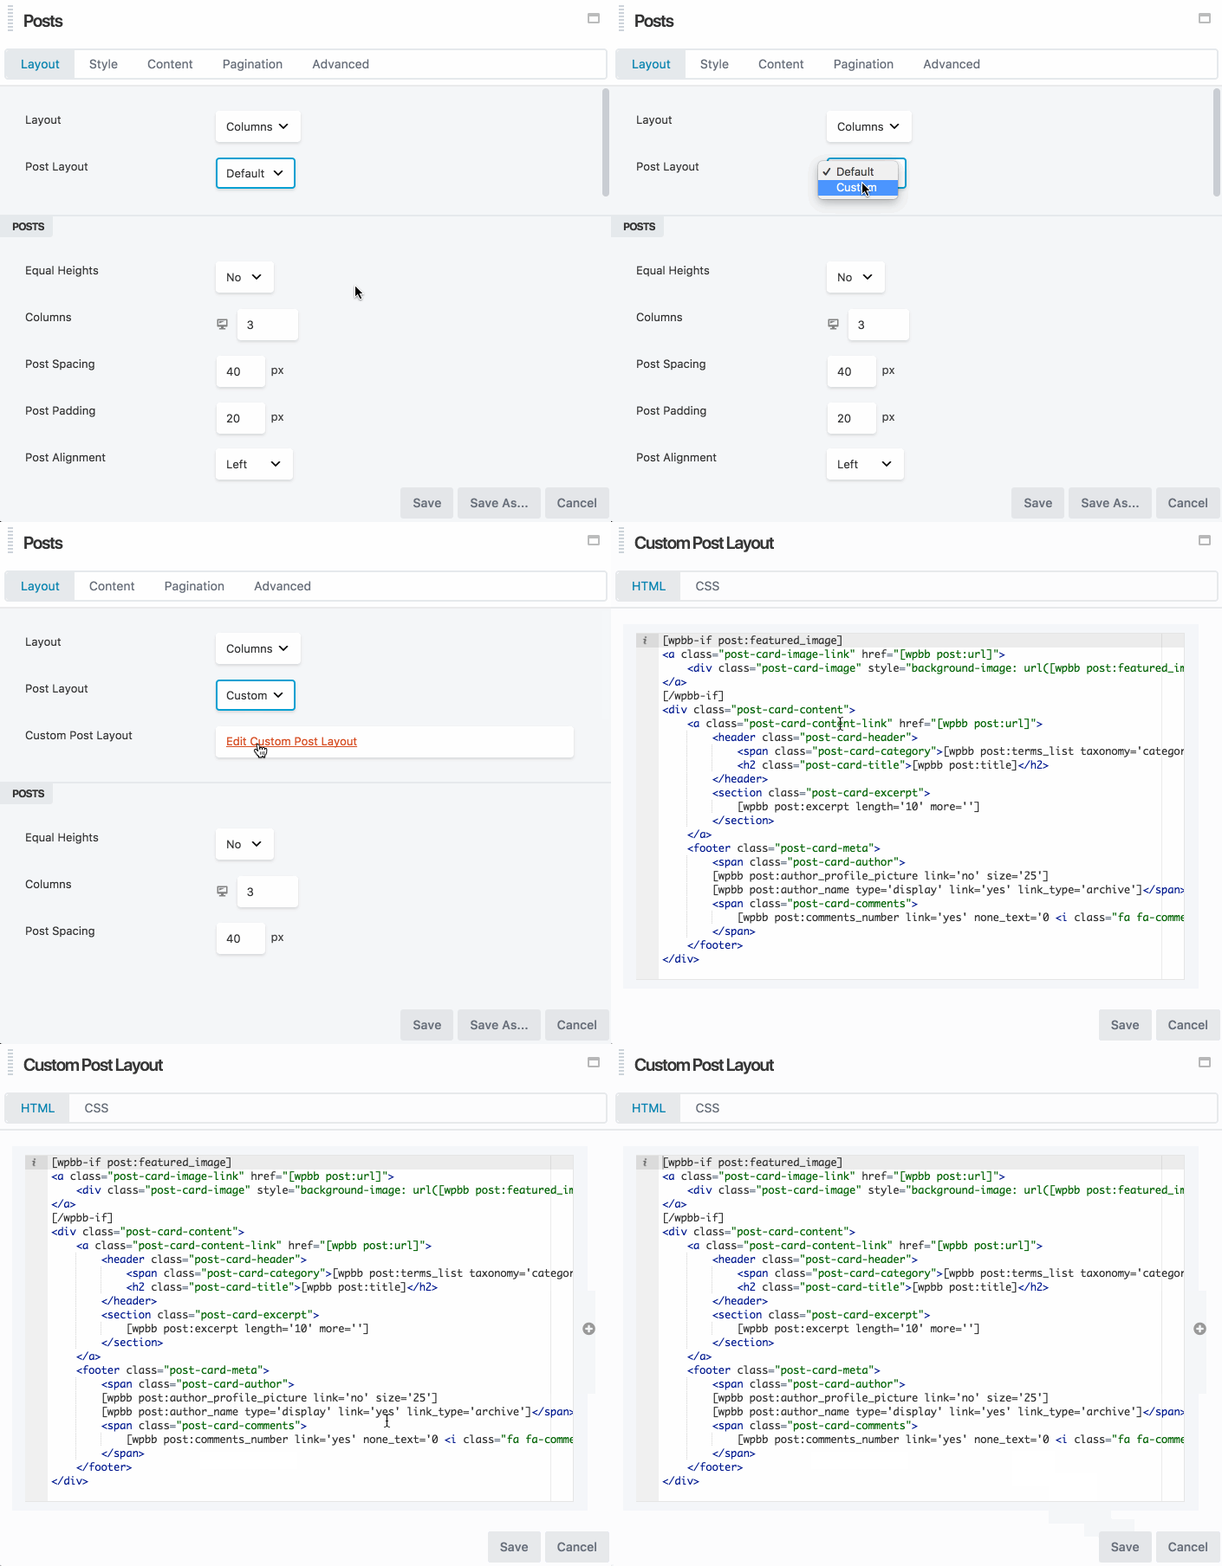
- Add a Posts module to your layout.
- In the Layout field, select Columns.
Tip: For best results, we recommend three columns of equal heights and 30px on post spacing options. - For Post Layout, select Custom.
- Click Edit Custom Post Layout. This opens the custom post layout HTML editor.
- Replace the existing HTML with the following code to create a card layout.
[wpbb-if post:featured_image]
<a class="post-card-image-link" href="[wpbb post:url]">
  <div class="post-card-image" style="background-image: url([wpbb post:featured_image size='full' display='url']);"></div>
</a>
<div class="post-card-content">
  <a class="post-card-content-link" href="[wpbb post:url]">
      <header class="post-card-header">
          <span class="post-card-category">[wpbb post:terms_list taxonomy='category' separator=', ' linked='no']</span>
          <h2 class="post-card-title">[wpbb post:title]</h2>
      </header>
      <section class="post-card-excerpt">
          [wpbb post:excerpt length='12' more='']
      </section>
  </a>
</div>
[wpbb-else]
<div class="post-card-content">
  <a class="post-card-content-link" href="[wpbb post:url]">
      <header class="post-card-header">
          <span class="post-card-category">[wpbb post:terms_list taxonomy='category' separator=', ' linked='no']</span>
          <h2 class="post-card-title">[wpbb post:title]</h2>
      </header>
      <section class="post-card-excerpt">
          [wpbb post:excerpt length='46' more='']
      </section>
  </a>
</div>
[/wpbb-if] - Click the CSS tab and replace the existing CSS with the following rules.
.fl-post-grid-post {
-webkit-transition: all 0.5s ease;
        transition: all 0.5s ease;
border-radius: 5px;
-webkit-box-shadow: 8px 14px 38px rgba(39, 44, 49, 0.06), 1px 3px 8px rgba(39, 44, 49, 0.03);
        box-shadow: 8px 14px 38px rgba(39, 44, 49, 0.06), 1px 3px 8px rgba(39, 44, 49, 0.03);
-webkit-backface-visibility: hidden;
        backface-visibility: hidden;
}
.fl-post-grid-post:hover {
-webkit-transition: all 0.3s ease;
        transition: all 0.3s ease;
-webkit-transform: translate3D(0, -1px, 0);
        transform: translate3D(0, -1px, 0);
-webkit-box-shadow: 0 0 1px rgba(39, 44, 49, 0.1), 0 3px 16px rgba(39, 44, 49, 0.07);
        box-shadow: 0 0 1px rgba(39, 44, 49, 0.1), 0 3px 16px rgba(39, 44, 49, 0.07);
}
.fl-post-grid-post a,
.fl-post-grid-post a:hover {
text-decoration: none;
}
.post-card-image-link {
overflow: hidden;
position: relative;
display: block;
border-radius: 5px 5px 0 0;
}
.post-card-image {
height: 150px;
background-position: center;
background-size: cover;
}
.post-card-content {
display: block;
padding: 25px;
font-size: 14px;
}
.post-card-content-link {
color: #15171a;
}
.post-card-content-link:hover {
text-decoration: none;
}
.post-card-category {
display: block;
margin-bottom: 4px;
letter-spacing: 0.5px;
text-transform: uppercase;
color: #999999;
font-size: 12px;
font-weight: 500;
line-height: 1;
}
.post-card-title {
margin-top: 0;
margin-bottom: 20px;
font-size: 18px;
font-weight: bold;
} - Click Save to close the module, then click Done > Publish to publish the page.
Your Post module should now display using a card layout. - If you want to make style changes, open the page for editing again and modify the custom post layout CSS as necessary.