Load Google fonts locally (GDPR)
Beaver Builder accesses Google Fonts through its Content Delivery Network (CDN).
Google claims to be compliant with GDPR in their use of personal information. If you still want to load Google fonts locally from your own server, this article has the procedure to do so.
Beaver Builder includes Font Awesome 5 icons with the plugin and loads them locally.
Load Google Fonts locally
This tutorial affects both the Beaver Builder plugin and the theme. It changes the way the actual font files are delivered. It doesn’t change the way that fonts are selected in modules and in the Customizer.
The easiest way to generate both the CSS and the web fonts is to use the Google Webfonts Helper site, which we’ve included in the steps here.
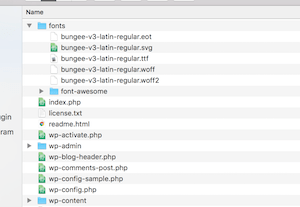
- Create a folder called fonts in your site’s root directory.
- Stop all remote calls to Google Fonts made by Beaver Builder by adding the following code to your child theme’s functions.php file.
// module enqueued google fonts
add_filter( 'fl_builder_google_fonts_pre_enqueue', function( $fonts ) {
    return array();
} );
// takes care of theme enqueues
add_action( 'wp_enqueue_scripts', function() {
    global $wp_styles;
    if ( isset( $wp_styles->queue ) ) {
        foreach ( $wp_styles->queue as $key => $handle ) {
            if ( false !== strpos( $handle, 'fl-builder-google-fonts-' ) ) {
                unset( $wp_styles->queue[ $key ] );
            }
        }
    }
}, 101 );
The entire list of Google fonts will still be available in the dropdown list in Beaver Builder modules and Customizer fields, but because this code stops all remote calls, only the fonts you add with this procedure will work in the rendered page.
Do all of the following steps for each font you plan to add.
Go to the Google Webfonts Helper site at https://google-webfonts-helper.herokuapp.com/fonts.
In the menu on the left, select a Google font.
In this tutorial, we’ll select the font called Bungee.In the first two sections, select the charsets and styles you want for that font.
In the third section called Copy CSS, in the Customize folder prefix (optional) field, change the font path to the full URL to the fonts folder, ending with a forward slash, as shown in the following screenshot.
This changes the path at various places in the CSS; check to make sure it matches where you placed the fonts folder.
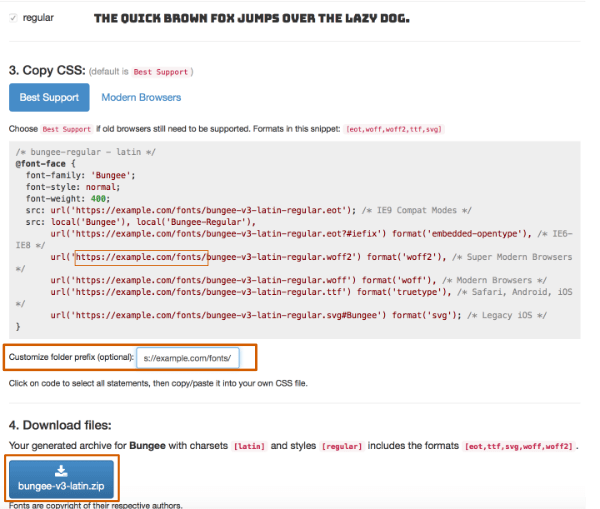
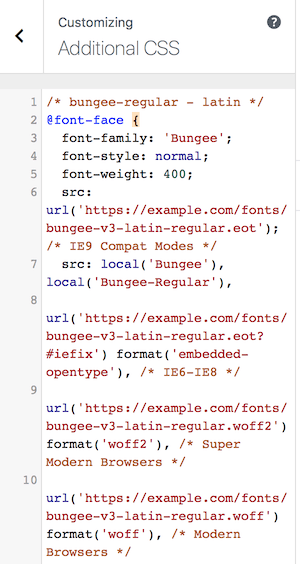
Copy the CSS in the box in the third section.
Click the button in the fourth section to download the zip archive of the web font files for that font.
The download button is shown in the previous screenshot.Add the CSS to the place where you normally add global CSS rules.
See the article for where to put CSS code
Extract the archive you downloaded and upload the individual font files (eot, svg, ttf, woff, woff2) to your fonts folder, as shown in the following screenshot.
Test by adding the font to a Beaver Builder module, such as a Heading module, to see if the correct Google font shows up. If you’re using the Beaver Builder Theme, you can test by selecting that font in Customize > General > Headings or Customize > General > Text.
Remember that although you’re still seeing the full Google font list, only the ones you’ve uploaded to your site and provided the CSS for will work.